Setting Up Your Account
Setting Up Your Account
Getting started with AutomateNexus CRM involves a streamlined onboarding process that takes you from account creation through organization setup, workspace configuration, team invitations, and personal profile customization. This guide walks you through every step in detail so you can configure your environment correctly from the start and avoid common setup pitfalls.
Step 1: Account Creation and Authentication
To begin using AutomateNexus CRM, you need to create an account. Navigate to the login page and choose one of the following authentication methods:
- Email and password — Enter your email address and create a secure password. You will receive a verification email that you must confirm before accessing the platform.
- Google SSO — Click the Google sign-in button to authenticate using your Google account. This method automatically verifies your email and streamlines the login process.
After successful authentication, you will be redirected to the application. If this is your first time logging in, the system will detect that you do not yet belong to an organization and will guide you through the onboarding wizard.
Password Requirements
If you choose email and password authentication, your password must meet the following criteria:
- Minimum 8 characters in length
- At least one uppercase letter
- At least one lowercase letter
- At least one number
- At least one special character is recommended for enhanced security
Email Verification
After registering with email and password, check your inbox for a verification email from AutomateNexus. Click the verification link to activate your account. If you do not receive the email within a few minutes, check your spam folder or request a new verification email from the login page.
Step 2: The Onboarding Wizard
The Organization Onboarding wizard is a guided multi-step flow that appears when you first log in without an existing organization. This wizard is implemented as a dedicated onboarding flow accessible at the /organization-onboarding route. Here is what each step involves:
Step 2a: Accept Invitation or Create New Organization
If you received an invitation link from an existing organization, the onboarding wizard will display the invitation details including the name of the person who invited you and their organization. You can accept the invitation to join their organization directly. If you did not receive an invitation, you will proceed to create a new organization from scratch.
Step 2b: Organization Details
In this step, you provide the foundational information about your company or team. The organization form includes the following fields, all of which should be filled out as completely as possible:
| Field | Description | Required |
|---|---|---|
| Organization Name | The display name of your company or team (e.g., Acme Corporation) | Yes |
| Slug | A URL-friendly identifier used in links and API references (auto-generated from name) | Yes |
| The primary contact email for the organization | Yes | |
| Phone | Organization phone number for contact purposes | No |
| Website | Your company website URL | No |
| Description | A brief description of your organization and what it does | No |
| Address | Street address of your organization headquarters | No |
| City | City where your organization is located | No |
| State | State or province | No |
| Zip Code | Postal or zip code | No |
| Country | Country of operation | No |
| Active Status | Toggle to set the organization as active or inactive | Yes (default: active) |
Step 2c: Plan Selection
During onboarding, you will be presented with available subscription plans. Each plan determines your usage limits including the number of users, contacts, deals, storage, and access to premium features. Review the plan comparison and select the tier that matches your team size and needs. You can always upgrade later from Support and Configuration > Plans.
Step 2d: Onboarding Completion
Once you complete the wizard, your organization is created, your profile is linked to it, and you are redirected to the main Dashboard. A success confirmation is displayed, and you can immediately begin configuring your workspace.
Step 3: Creating and Managing Your Organization
After initial setup, you can manage your organization settings at any time by navigating to Organization and Users > Organizations in the sidebar. The Organizations page provides tabs for different management functions:
Organization Details Tab
This is where you view and edit all the fields you entered during onboarding. Click the edit button to modify any field. Changes are saved when you click the Save button. The organization details include name, slug, email, phone, website, description, address, city, state, zip code, country, and active status.
Organization Relationships Tab
For enterprise deployments, AutomateNexus supports hierarchical organization structures. If your organization type is master or parent, you will see the Organization Relationships tab where you can manage parent-child relationships between organizations. This is useful for agencies managing multiple client organizations or enterprises with regional divisions.
Onboarding Settings Tab
Configure the onboarding experience for new users joining your organization. The Onboarding Settings Editor lets you customize the welcome flow, required profile fields, and initial workspace assignment for new members.
Step 4: Workspace Configuration
Workspaces are isolated data environments within your organization. They allow different teams to maintain separate sets of customers, deals, projects, and other records while sharing the same organizational infrastructure. Navigate to Tools and Resources > Workspaces to manage workspaces.
When to Use Workspaces
Workspaces are ideal in the following scenarios:
- Multiple departments — Your sales team, marketing team, and support team each need their own customer lists and deal pipelines.
- Regional offices — Different geographic regions need separate data but unified reporting at the organization level.
- Client segmentation — You want to separate enterprise clients from SMB clients with different workflows for each.
- Testing and development — Create a sandbox workspace for testing configurations before applying them to production.
Creating a Workspace
To create a new workspace:
- Navigate to Tools and Resources > Workspaces in the sidebar.
- Click the Create Workspace button.
- Enter a descriptive name for the workspace (e.g., Sales Team, EMEA Region, Enterprise Accounts).
- Optionally add a description explaining the purpose of this workspace.
- Click Save to create the workspace.
After creation, the workspace appears in the workspace switcher. Team members can be assigned to one or more workspaces, and data within each workspace is isolated from other workspaces by default.
Switching Between Workspaces
The workspace switcher is accessible from the top of the application. When you switch workspaces, all data views (customers, deals, projects, dashboard metrics) automatically filter to show only the data belonging to the selected workspace. This isolation is enforced at the database level for security.
Step 5: Inviting Team Members
To invite colleagues to your organization, navigate to Organization and Users > Users. The Users page has three tabs: Members, Roles and Permissions, and Cross-Organization (visible only for master/parent org types).
Invitation Process Step-by-Step
- Click the Members tab on the Users page.
- Click the Invite User button.
- Enter the email address of the person you want to invite.
- Select a role for the new user (see role descriptions below).
- Optionally assign them to specific workspaces.
- Click Send Invitation.
The invited user will receive an email with a link to accept the invitation. When they click the link, they are taken to the invitation acceptance page where they can create their account (or link their existing account) and join your organization.
Role Descriptions
| Role | Description |
|---|---|
| Super Admin | Full platform access across all organizations. Can manage billing, plans, organization hierarchy, and all administrative functions. Typically reserved for platform owners or top-level administrators. |
| Org Admin | Full access within their organization including user management, settings configuration, workspace creation, and all operational features. Cannot manage other organizations or platform-level settings. |
| Standard User | Access to day-to-day operational features such as customers, deals, projects, tasks, and communication tools. Cannot modify organization settings, manage users, or access administrative functions. |
Step 6: Profile Configuration
Your personal profile determines how you appear to other team members and controls your individual preferences. Navigate to Settings in the sidebar to access your profile and preferences. The Settings page is organized into multiple tabs:
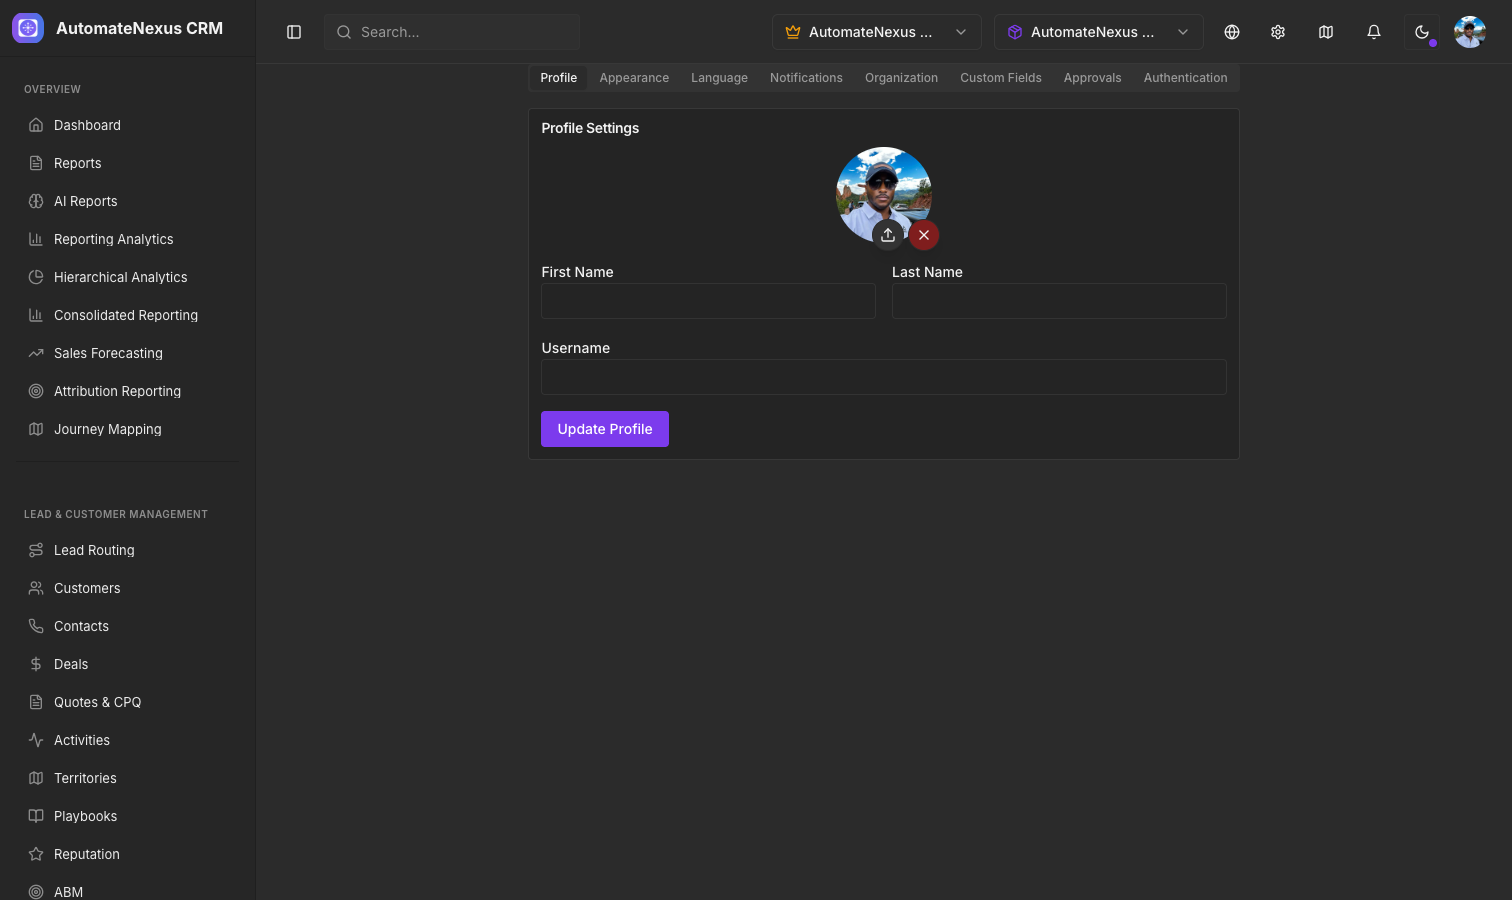
Profile Tab
The profile tab displays and allows editing of your personal information:
- First Name — Your given name as displayed throughout the platform.
- Last Name — Your family name or surname.
- Username — A unique username for your account.
- Profile Image — Upload a profile photo using the profile image upload component. Supported formats include JPG, PNG, and GIF. The image is displayed as your avatar in activity feeds, comments, and team views.
- Email — Your email address (read-only, set during account creation).
- Role — Your assigned role within the organization (read-only, set by administrators).
- Organization ID — The identifier of your current organization (read-only).
Appearance Tab
Customize the visual appearance of the application:
- Theme Mode — Switch between light mode, dark mode, or system default (follows your operating system preference).
- Accent Color — Choose a custom accent color for the interface.
- Compact Mode — Toggle compact mode for denser information display.
Language Tab
AutomateNexus CRM supports multiple languages. The language settings page allows you to:
- Select your preferred interface language from the available options.
- The entire application interface including sidebar labels, form fields, buttons, and system messages will be translated to your selected language.
- Language preferences are stored per user and persist across sessions.
Notifications Tab
Configure how and when you receive notifications:
- Email notifications — Toggle email alerts for various events such as deal updates, task assignments, meeting reminders, and system announcements.
- In-app notifications — Control the notification bell icon behavior and which events trigger in-app alerts.
- Notification frequency — Choose between real-time, hourly digest, or daily summary delivery.
Organization Tab
View and manage organization-level support settings. This tab provides access to the Organization Support Settings configuration where admins can set up support email addresses, auto-reply templates, and escalation rules.
Custom Fields Tab
Available to Org Admins and Super Admins, this tab lets you create and manage custom fields that extend the data model for contacts, customers, deals, and other entities. Custom fields appear in forms throughout the platform and are searchable and filterable.
Approvals Tab
The approvals dashboard provides a centralized view of all pending approval requests within your organization. Approval workflows can be configured for actions such as deal discounts exceeding a threshold, large invoices, or user permission changes.
Authentication Tab
Manage your authentication settings including password changes and connected authentication providers (Google SSO). You can also sign out of your account from this tab.
Step 7: White-Label Logo Upload
AutomateNexus CRM supports white-label branding, allowing you to replace the default logo with your own company logo. This is handled through the WhiteLabelLogo component and is configured at the organization level. To upload your logo:
- Navigate to Organization and Users > Organizations.
- Select your organization and click edit.
- Find the logo upload section and click to upload your company logo.
- Supported formats are PNG, JPG, and SVG. Recommended dimensions are 200x50 pixels for the sidebar display.
- The logo will appear in the sidebar, login pages, client portal, and any public-facing pages associated with your organization.
When users from other organizations receive invitation links, the branding from the inviting organization is displayed on the onboarding pages, creating a seamless branded experience.
Step 8: Billing and Plan Selection
Manage your subscription and billing from Support and Configuration > Plans or the Billing page. The billing system integrates with Stripe for secure payment processing. Key billing features include:
- Plan comparison — View all available plans with their features, limits, and pricing side by side.
- Plan upgrade — Upgrade your plan at any time. The change takes effect immediately, and prorated charges are applied automatically.
- Customer portal — Access the Stripe customer portal to manage payment methods, view invoices, and update billing information.
- Subscription status — View your current plan name, monthly price, and subscription status from the Billing page.
- AppSumo redemption — If you have an AppSumo code, use the redemption page at /appsumo-redeem to activate your lifetime deal.
Troubleshooting First-Time Setup Issues
If you encounter problems during your initial setup, here are solutions to the most common issues:
| Issue | Cause | Solution |
|---|---|---|
| Verification email not received | Email may be in spam or blocked by your email provider | Check spam folder. Wait 5 minutes and try resending. Whitelist the AutomateNexus sending domain. |
| Invitation link expired | Invitation links have a time limit for security | Ask the administrator to resend the invitation. Invitation tracking shows view and acceptance status. |
| Cannot see organization after login | Profile not yet linked to an organization | Complete the onboarding wizard. If the wizard does not appear, navigate to /organization-onboarding directly. |
| Workspace not visible | You have not been assigned to the workspace | Ask an Org Admin to assign you to the relevant workspace from the Users page. |
| Cannot invite team members | Insufficient permissions | Only Org Admins and Super Admins can invite users. Check your role in Settings > Profile. |
| Logo not displaying after upload | Image format or size issue | Ensure the logo is PNG, JPG, or SVG format. Keep file size under 2MB and dimensions around 200x50px. |
| Cannot access billing | Not an organization admin | Billing management requires Org Admin or Super Admin role. Contact your administrator. |
| Loading timeout during onboarding | Network or server delay | The system has a 15-second timeout. If the request times out, a retry option will appear. Click retry or refresh the page. |
Next Steps
Once your account is fully configured, proceed to the following areas to start using AutomateNexus CRM productively:
- Dashboard Overview — Learn how to read and customize your main dashboard widgets and KPIs.
- Managing Contacts and Customers — Import and organize your customer database.
- Deal Pipeline Management — Set up your sales pipeline stages and start tracking deals.
- User Roles and Permissions — Configure granular access control for your team members.